Showing posts with label blue. Show all posts

Saturday, August 29, 2015

Born Pretty Store Floral Water Decals

Hi,
today I have some floral girly nails for you.

 In which I put zero effort to get this awesome look. They are so pretty and shiny in real life but my camera wont catch it... These are water decals 002A from BornPrettyStore.com. They are super easy to use. You paint your nails in a color of your choice. I used Wild White Ways by essence, because I want the colors to pop. You can put them also on your bare nails but I think the colors wont show up that much.
Then cut the decal in smaller pieces so they fit on your nail. I prefer to cut them in a little bit wider pieces because of the curve of my nails.
Put them into lukewarm water for 30 seconds. Now you should be able to slide them off the paper and place them on your nail. The side which was on the paper comes on the nail, I did it on my index finger wrong. It was the second nail I did and had a little bit of a struggle. It fold and rolled it so I didn't knew which side is which... But all the other nails worked fine.
Clean up the excess and let it dry. Finally put some topcoat on.
To get 10% off on BornPrettyStore.com simply use my code TAMPX31
Hope you like it and see you soon.
PR Sample

Thursday, August 27, 2015

Perfect Gradient? No!

Hi,
"Nooot?! But it looks like!" That's what you're saying, isn't? It's just a thermo in transition... not just a thermo! It's the best and most beautiful I ever had.

Hi,
"Niiiicht?!", fragt ihr euch jetzt, "aber es sieht doch so aus!" Es ist lediglich ein Thermo Lack während des Farbwechsels... nicht irgendein Thermo! Es ist der beste und schönste, den ich je hatte.


This is No. 110 by BornPrettyStore.com. As you can see it shifts from a bright vibrant turquoise (warm) to a nice blue-ish purple (cold) and it shimmers! The polish is so sensitive that it sometimes shifts on my nails with normal body temperature, not only in ice and hot water.

Das ist Nr. 110 von BornPrettyStore.com. Wie ihr sehen könnt wechselt er von einem leuchtendem Türkis (warm) zu einem netten Blau-lila und er schimmert! Der Lack ist so empfindlich, dass er nur mit Hilfe meiner leicht schwankenden Körpertemperatur schon die Farbe wechselt und nicht wie andere mit heißem oder Eiswasser!

This polish goes on nice and smooth. I didn't need to clean up and I always have to. Drying time is a little bit longer than the average polish.
The brush is a little bit short in comparison to the cap, but you can lift off the squared cap and have a round thinner one underneath. I didn't had problems with that but I read some reviews where that was mentioned.
It's also available in 4 other colors. And as usual I have a 10% off code for you: TAMPX31

Dieser Lack lässt sich einfach und gleichmäßig auftragen. Ich musste nicht mal die Ränder saubern, was ich immer machen muss. Trockenzeit ist etwas länger als beim Durschnittsnagellack, aber nicht dramatisch.
Der Pinsel ist etwas kurz im Verhältnis zur Kappe, aber man kann sie abziehen und hat dann anstatt der großen eckigen eine kleinere runde. Ich hatte zwar kein Problem mit der eckigen, aber hatte einige Reviews gelesen, in denen das angesprochen wurde.
Außerdem gibt es den Lack noch in 4 weitern Farben. Und wie immer habe ich noch einen 10% Rabattcode für euch: TAMPX31

Hope you like it and see you soon/ Hoffe euch gefällt's und bis bald

PR Sample

Wednesday, June 24, 2015

2 in 1

Hi,
today I show you the wheel from which the pearls are.
The Wheel by Born Pretty Store contains 11 different decorations.:
caviar-pearls in black, gold and silver/white, flatt back pearls in black and white, studs in silver and gold, both in round and squared, and rhinestones in silver and black

Hi,
wie versprochen zeige ich euch heute das Wheel, aus dem die Perlen sind.
Das Wheel von Born Pretty Store enthält 11 verschiedene Dekorationen:
Kaviar-Perlen in Schwarz, Gold und Weiß/Silber, Halbkugelperlen in Schwarz und Weiß, Nieten in Gold und Silber, jeweils in quadratisch und rund und Strasssteine in Silber (zwei Kammern) und Schwarz

The Wheel offers so many possibility that I wanted to use as many as possible. I managed to use two of the four categories. I've used the studs and the rhinestones in silver.
The blue polish on my right hand is "obsessed" 65 and the red one is "the heart wants what it wants" 62 both by uma.

Da das Wheel so viele Möglichkeiten bietet, wollte ich auch möglichst viele Dekorationen nutzen. Letzten Endes sind es dann doch nur zwei der vier Kategorien geworden. Nämlich die Nieten und die Stasssteine in Silber.
Der blaue Lack, den ich rechts trage, ist "obsessed" 65 und der rote ist "the heart wants what it wants" 62 beide von uma.

"The heart wants what it wants" is a berry semi transparent nail polish with shattered holo pigments. Its surface is a little bit uneven because of the glitter, but a bit of top coat will solve that.

"The heart wants what it wants" ist ein beerig semitransparenter Nagellack mit shattered Hologlitzer. Die Oberfläche ist leicht uneben aufgrund des Glitzers, aber nichts war man mit ein bisschen Top Coat nicht ausgleichen kann.
  
"Obsessed" reminds me of a cobalt blue shimmering car polish. It dries smooth and shiny.
The both polishes are new by uma. They cost 2,70€.

"Obsessed" erinnert an einen kobaltblau schimmernden Autolack. Er trocknet glatt und glänzend.
Die Lacke sind grade neu von uma und zum Beispiel bei real. Preis liegt bei ca 2,70€.

Back to the wheel... For me it's the perfect starter kit, because of all the different decorations. Every thing you need is in there. And that for only $3.06 or €2,79 at the moment! 
Don't forget my 10% off coupon TAMPX31
Hope you like it (:

Und zurück zum Wheel... Für mich ist es das perfekte Starter Set, weil es so viele verschiedene  Basisdekorationen enthält. Alles was das Herz begehrt ist da drin. Und das für nur $3,06 also 2,79€ momentan!
Vergesst nicht meinen 10% Rabattcode TAMPX31
Hoffe es gefällt euch (:

PR Sample

Thursday, May 7, 2015

Electriiiiiic Reverse Blobbicure

Hi!
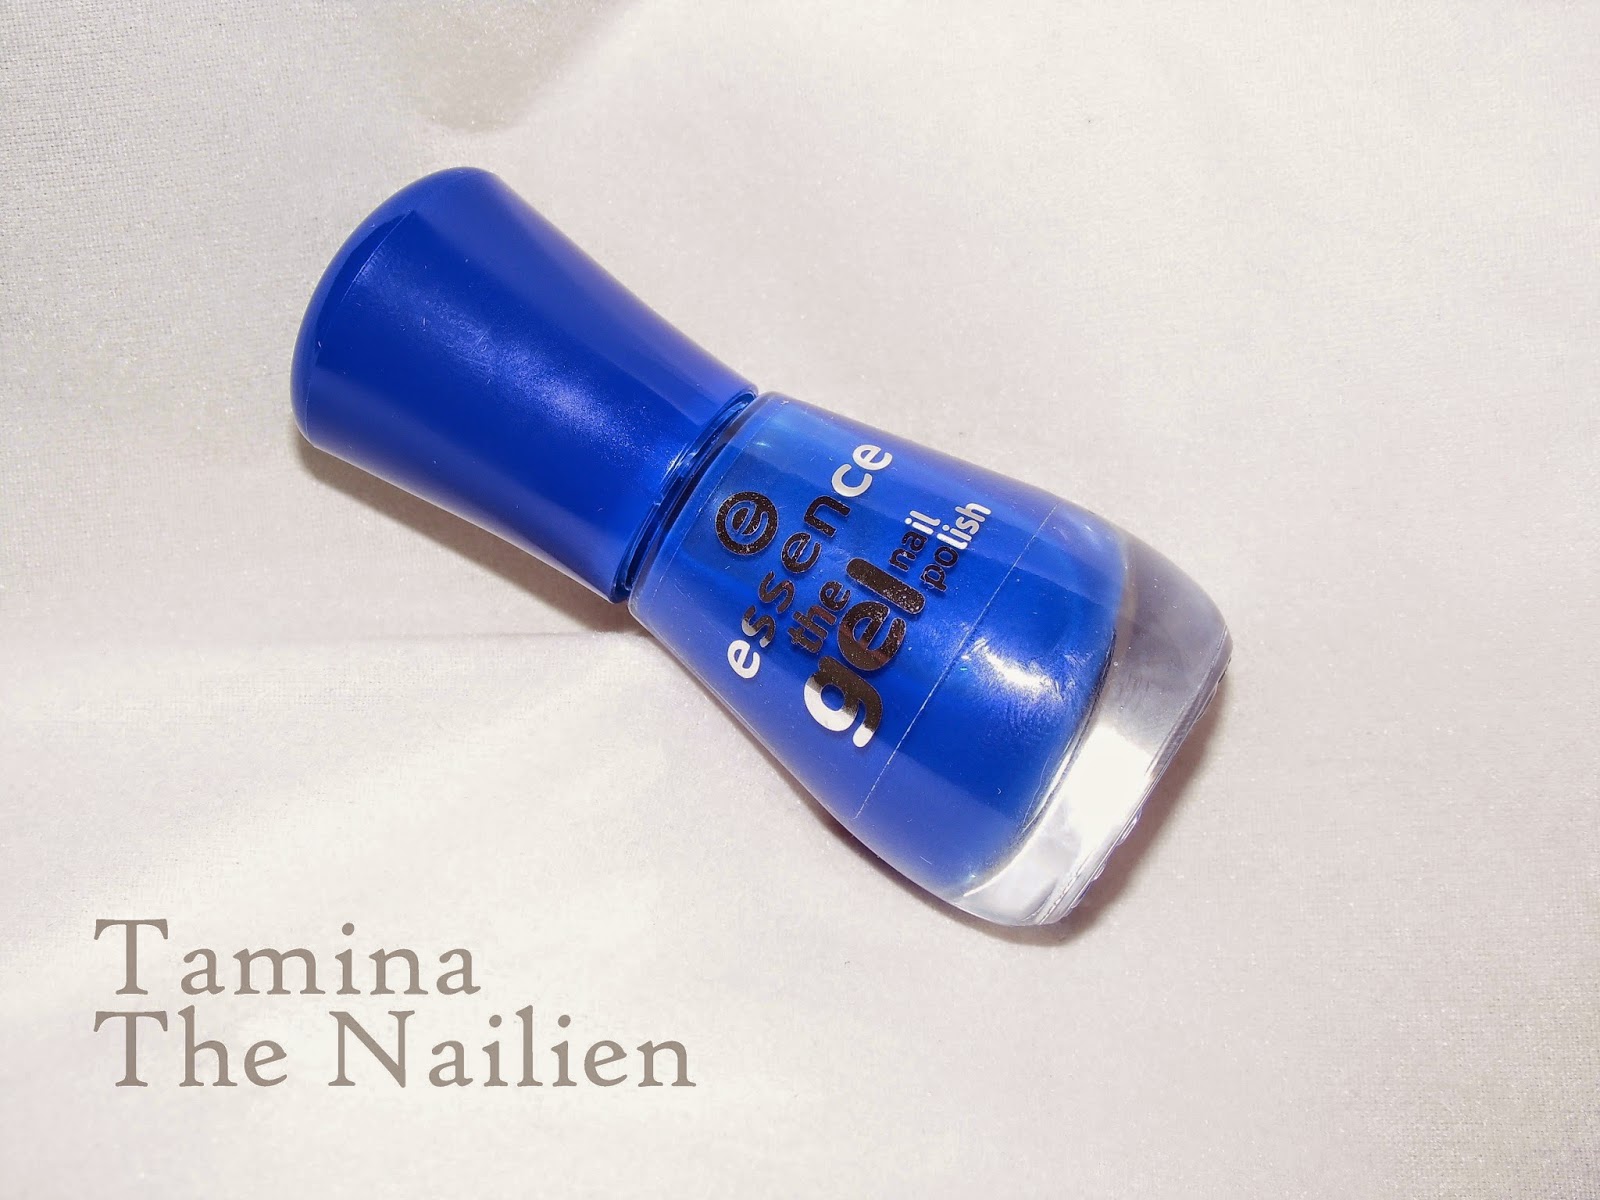
Today I have a swatch of 31 "electriiiiiic" by essence and a pictorial for a technique, which I call REVERSE BLOBBICURE.
Hi!
Heute habe ich für euch einen Swatch von 31 "electriiiiiic" von essence und ein Pictorial für eine Technik, die ich REVERSE BLOBBICURE (also umgekehrt) nenne.
First some facts about electriiiiiic. It's one of the 46 new "the gel" nail polishes.
It's electric ultramarine, semi-transparent ( after two layers you can slightly see the nail line) and has a super glossy gel finish. The brush is short/medium length, wide, flat and a round tip; it's the same as the one of the color&go polishes.

Erst einmal ein paar Fakten über electiiiiiic. Er ist einer der 46 neuen "the gel" Nagellacke.
Er ist kräftig ultramarin, semi-transparent ( bei zwei Schichten kann man die Nagellinie noch leicht sehen) und hat ein super glossy Gel-Finish. Der Pinsel ist kurz/mittellang, breit, flach und abgerundet; es ist der gleiche wie bei den color&go Lacken.

It was easier to apply, because of its better formula. I think it's much better than the formula of the older ones. It's more fluid so you can apply it more evenly! And it drys faster.
But it stinks really awful! Like a ten years old nail polish! The other two essence gel polishes I have don't smell like that.

Das Auftragen war einfacher aufgrund der verbesserten Formel. Ich finde sie um einiges besser als die von den alten, da der Lack jetzt ein bisschen flüssiger ist und sich somit gleichmäßiger verteilen lässt! Außerdem trocknet er auch noch schneller.
Aber er stinkt widerlich! Wie die Lacke vor zehn Jahren! Die anderen zwei essence gel Lacke, die ich habe, stinken nicht so.


The new gel polishes really surprised me, because they dried fast and even (that essence polishes never do!)

Die neuen Gel Lacke haben mich wirklich überrasched, da ich nie gedacht hätte, dass sie so schnell, glatt und gloss trocknen (weil sie das nie tun!)


How to: Reverse Blobbicure!


So here is the pictorial for my REVERSE BLOBBICURE

Step 1: Paint with your base color (it's best when your base color is a little bit sheer) on a piece of plastic (try if you can peel dried polish of it. On some plastic this doesn't work)

Step 2: While the polish is still wet, drop some drops of a light polish and some of a darker polish in it. You can tilt it a bit to create the perfect pattern. Now you have to wait until it's dry... I peeled it of after half a day...but when you put fast drying top coat underneath it might peel of after approximately 2 hours.

Step 3: Peel it off and turn it around...it should look like this

Step 4: Paint your nail in your base color. I brushed on only one layer, because it's just the base to stick the design on.

Step 5: Stick your design on the nail while it's still tacky.

Step 6: Cut off everything that's not on your nail.

Step 7: Clean up and put topcoat on it to seal it.

Step 8: Now you have a Reverse Blobbicure

Schritt 1:
Mir der Grundfarbe (am besten einen nicht ganz deckenden nehmen) eine Nagel große Fläche auf ein Plastikstück malen (ich benutze eine Deckel einer Chipsdose), weil man den getrockneten Nagellack von ihm abziehen kann


Schritt 2:
Während der Lack noch feucht ist, ein paar Tropfen von dem hellen Lack und ein paar Tropfen von dem dunkleren in die Grundfarbe tropfen. Man kann es jetzt noch ein bisschen hin und her kippen um es noch anzupassen.
Jetzt warten bis alles getrocknet ist. Dauert bei mir ca. einen halben Tag (aber wenn man einen schnell trocknenden Topcoat vor der Grundfarbe verwendet, kann die Trocknungszeit verkürzt werden auf vielleich 2 Stunden.

Schritt 3:
Abziehen und umdrehen. Sieht dann wie oben aus

Schritt 4:
Nagel in Grundfarbe lackieren (eine Schicht finde ich ausreichend, da ich ihn nur zu festkleben des Designs benötigt habe.

Schritt 5:
Design auf den noch nicht ganz durchgetrockneten Lack legen und abdrücken

Schritt 6:
Ränder wegschneiden.

Schritt 7:
Mit Topcoat versiegeln

Schritt 8:
Fertig ist die Reverse Blobbicure

Hope you enjoyed the pictorial and will try it. Would love to see it.

Hoffe, euch gefällt das Pictorial und ihr werdet es ausprobieren. Würde das dann wahnsinnig gerne sehen.